Projects - Table of Contents:
Click
on a project name to quickly jump to it!
- Performance Analysis of a New Generation Supply Chain Robot for Attabotics
- IoT Garage Door Indicator (GDI) with Companion Android App
- Manual Generator & Powerbank
- Stroke Rehabilitation Kit "DexAid"
- Computer Vision Operated Quadrotor Drone
- Hovercraft
- FIRST Robotics Competiton: Recycle Rush
- Miscellaneous
- Wiretap
- Alarm System
- Duplicate ID Watch Attachment
- Emotional Robot
- AM/FM Generator with PWM & an FPGA Board
- Electronic Die/Digital Clock
- Remote Controlled Light Switch Flipper
- Rise & Fall Android Game
-
Performance Analysis of a New Generation Supply Chain Robot for Attabotics
| Capstone
for Final Year in University For my final year in my Bachelor's degree at the University of Calgary, I was fortunate enough to work with such an amazing team in tackling our capstone project with our sponsor, Attabotics – a Calgary based company that designs and manufactures innovative robotic warehousing solutions. The Team This project wouldn't have been such a success without the hard work and dedication of the entire team, S.N. Group, which are all responsible for different aspects of this project. The team members (including our roles and LinkedIn) include:
 Image
of the Team Members
|
|
| The
Problem Attabotics recently developed a new version of the ant, which comes with new technical capabilities. These new capabilities primarily enhance the routing behaviour, allowing new types of movements. Two new questions arose – how do they compare to the old generation ants, and what business impact will the new generation have on customers? The tools available were unable to answer either of these questions. What Attabotics needed was a lightweight piece of software that could output quantitative data, and offer a visualization for new and existing clients. Video Demo with
Narration by Helen Tan
|
Our
Solution We developed an application combining several different modules, each lead by an individual team member:
With the completed robot routes, the user can launch a 3D visualizer from the GUI. This gives a high level overview of how the robots behaved in a given pick cycle, and offers the ability for high-level troubleshooting (such as robot congestion). Another option given to the user is the ability to output the robot routes into a large .csv file, which can be analyzed by other tools and spreadsheet programs. All of these modules were integrated into a single lightweight application, which is demonstrated in the video below. Attabotics is very pleased with the result of our project, and they have expressed interest in further developing it to solve other business problems. |
| A
Special Thanks We would like to express our heartfelt gratitude to our TA, Tariq Al-Shoura, for providing his wisdom, guidance, and support during project impasses and in our times of need. Thank you to our technical advisors Professor Henry Leung and Professor Norm Bartley for their feedback and input. And lastly thanks to Attabotics and our contacts Mr. Mark Dickinson and Mr. Gordon Paynter for providing us with such a unique opportunity and project. Links For a complete look at our project at the Engineering Design Fair 2022, you can visit our project link here! Additionally, a higher quality version of the demo video above can be seen here. |
|
-
IoT Garage Door Indicator (GDI) with Companion Android App
| The GDM
This project addresses the issue we all have halfway through our
commute to work: "Did I leave my garage door open?" Forgetting
is both stressful and a risk to the security of the house. The
GDI allows the user to see the status of their garage door
(opened or closed), as well as to control it, all from the
companion app built in Java using Android Studio.
|
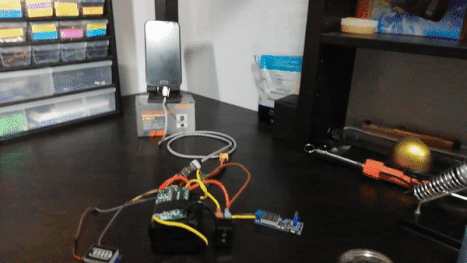
 Signal received by
garage door from the development board
|
 Demonstration of app to database interaction |
How does it work?The module makes use of
the NodeMCU ESP8266 development board. The board is connected
to the internet, reading and writing data to Google's Firebase
database. With the help of the companion app, the user can
control the garage door, receive the door's status via push
notification, and customize the settings (how long before
notified, password lock, add family members, door access log,
etc.).
Individual components of
the module as mentioned above has been tested and was ready to
be implemented together into a single module and single
standalone Android application. However, due to COVID-19, the
project has been cancelled. |
Project PresentationBelow is the final project presentation for the GDI, which includes more details such as the problem statement, engineering analysis, estimated costs, and so on.
Video Presentation with
Narration by Helen Tan
|
|
-
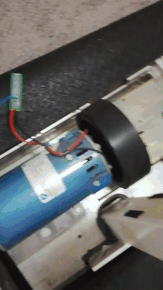
Manual Generator & Powerbank
| The Generator
Inspired by the video game Oxygen Not Included, the
generator was built in an attempt to make me exercise by
having it generate power as an incentive. Using an old
treadmill picked up for free from Kijiji, it is plugged into a
homemade powerbank that stores the power generated from the
treadmill.
|
 Generating stepped down voltage with treadmill |
 Charging phone using the homemade powerbank |
The
Powerbank
With the generator ready, the next step was to store the power
into a battery. This left me with 2 options, buy a powerbank
online, or build my own. After considering how cheaper and
easier purchasing one would be, I went ahead and bought the
necessary parts to build a powerbank from scratch.
The powerbank includes 6 18650 cells arranged in a 3S2P
configuration, this gives me a total of about 85Wh (12.6V at
6800mAh), and a Battery Management System (BMS) circuit for
overcharge and over-discharge protection. Finally, we got a
USB output for charging, and 2 separate inputs for both
traditional wall socket charging and treadmill charging.
|
DIY or BUY?
After all is
said and done, which one is more worth it? Well, it depends.
It's so much easier and cheaper to just buy a powerbank
online, but even trusted online sellers end up selling
misleading powerbanks (ie. less capacity than advertised), so
you might end up getting less than what you paid for.
On the other hand, building your own allows for more
customizability in types of inputs, outputs, and battery
configuration, and it is a pretty fun experience, but having
to pay for all the parts, equipment, and the cost of making
mistakes, especially if it's your first time, might discourage
some people. Not to mention the need for an enclosure to be
built or 3D-printed.
I'm pretty happy with how well my powerbank turned out to be,
but I don't have plans of bringing it with me to an airport
anytime soon. Not without an enclosure, at the very least.
|

Powerbank without an enclosure  Powerbank enclosure prototype |
-
Stroke Rehabilitation Kit "DexAid"
| Purpose of D.A.R.T. The Dexterity And
Rehabilitation Team, or D.A.R.T., was assigned a task: find
an engaging way for early-stage victims of stroke to
rehabilitate and improve recovery outcomes than traditional
methods. Thus, the DexAid was born. DexAid is a
stroke rehabilitation kit built for the health hack
competition "Innovation 4 Health," or i4h for short.
The problem
After a stroke, patients are required to wait for their
physiotherapy appointment to begin rehabilitation. This
contradicts the evidence that suggest that early
rehabilitation results in better recovery outcomes.
Additionally, current activities that patients can do for
immediate rehabilitation are repetitive and boring, resulting
in low patient compliance.
|
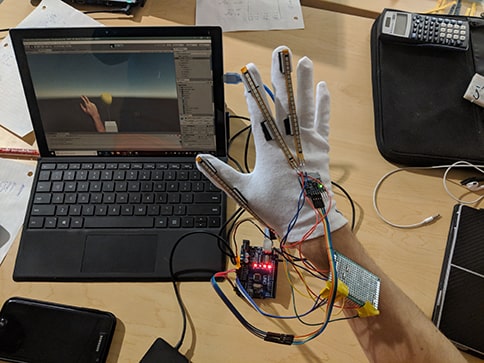 Sensor-fitted glove prototype connected to Arduino which receives and translates data for the Unity Game Engine |

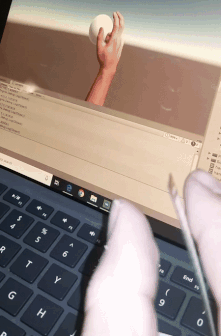 Testing the MPU6050 Accelerometer
and Gyro sensor (Left) & flexing the index finger in Unity
Game Engine with the flex sensor (Right)
|
DexAid
The DexAid is a system designed to promote patient
engagement by applying gamification to upper extremity
rehabilitation. In other words, we made it more entertaining
with video games. A lightweight and portable system, it
requires minimal assembly. The system has 2 parts: the
sensor-fitted glove, and a virtual web-based program that
translates data for a variety of games to interpret.
I was tasked in choosing what type of sensors we were
going to use, and how the glove will interact with the
program. The glove was fitted with a accelerometer and
gyroscope (using a MPU6050 breakout board) sensor for accurate
movement detection, as well as some flex sensors that change
resistance when stressed. The values of the sensor outputs are
then translated into data that can be used with the Unity Game
Engine with the use of an Arduino.
|
-
Computer Vision Operated Quadrotor Drone
| Summer Research in
China
As part of my summer research exchange in Shanghai, my project
involved researching on Autonomous Quadrotor Drones Landing on
a Moving Platform. The quadrotor has a downward-facing camera
and Inertial Measurement Unit (IMU) that accurately estimates
the state of the quadrotor, while the camera estimates and
predicts the motion states of the moving landing platform. The
aim of the project was to optimize the planning for the
quadrotor's landing trajectory.
|
 Testing control of drone via wireless local access network |
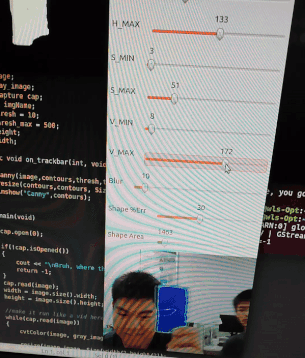 Demo of the computer vision program OpenCV |
My
Task My
main tasks include completing numerical analysis of landing
performance, conducting physical experiments, and completing a
technical report.
Our goal was to make use of the cameras and sensors fitted in the drone to be able to land onto a moving platform. I assisted in researching on methods for image and color recognition using OpenCV, an open source library of programming functions for C and C++ aimed at real-time computer vision. |
| Outside
of the lab
Since the research was abroad, of course I took the
opportunity to explore China, from Shanghai to Suzhou.
Together with fellow research exchange students from around
the world, such as Hong Kong, Taipei, and California, we spend
the weekends going to excursions and hanging out together,
assuming we're not hunkered down for the weekend during a
typhoon-induced flood.
 Group picture in Suzhou Garden
Museum
|
 Group picture in front of the Shanghai Pearl Tower |
-
Hovercraft
| The Hovercraft
As our final project for our Engineering class, 3
groups are tasked on building a hovercraft that can be ridden
by one of the group members. That member is then timed and
pitted against the other 2 competing teams.
Although all 3 groups are officially against each other, I assisted in the electrical work of the other 2 groups as they were falling behind as the deadline steadily approaches. The Materials
The hovercraft was built using some plywood, tarp, a leaf
blower, a large fan, 3d printed material, relays, switches, an
LED lightbulb and some ropes
|
 Testing with an individual riding
the hovercraft
|
 Evaluation of the hovercraft in the school's gymnasium |
The
Results
After weeks of planning, testing, and building, the
hovercraft was completed and ready to race. At the end of the
semester, all 3 groups bring their final product to the school
gymnasium. We take turns driving our hovercraft, and are timed
from the starting line to the end of the basketball court,
U-turn around a cone, and back to the starting line.
Our team has won 1st place* thanks to the efforts of the entire team. Regardless of how well the electrical work is done, it wouldn't have worked as well without the rest of the hovercraft being built properly and effectively. *By default. Out of the 3 teams, ours were the only working prototype
|
-
FIRST Robotics Competiton: Recycle Rush
| The Competition
The theme of the FIRST Robotics competition in 2015 was the
Recycle Rush, which involves picking up and stacking totes on
scoring platforms, putting pool noodles inside recycling
containers, and putting the containers on top of scoring
stacks of totes.
The team, cleverly named the Hunchbacks (of Notre Dame High School), built the recycling robot made from scrap metal, plywood, and extra pieces of electronics. My role was to assist the other team members in the construction of the robot, dubbed by our team leader as "The Ghettobot." Though we were in a clear disadvantage due to our budget, as opposed to our competitors, our robot was able to survive onto the quarter-finals, where we got absolutely demolished by high-end robots. Still, walking home at 8th place out of 31 competitors was a solid outcome for our beloved bot. |
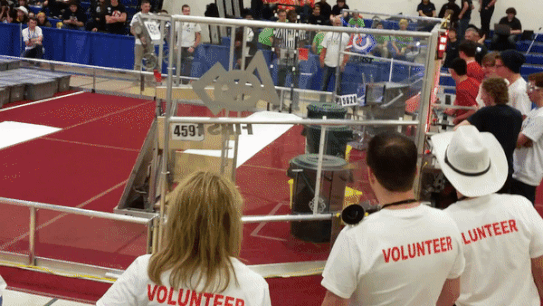 The team's robot, labelled with the team number 4591, in action |
 Loading the totes onto the playing field |
 The team watching the other competitors battle |
-
Miscellaneous
WiretapUsed
to record conversations with companies and messing with scam
calls. The left-half is the wiretap that connects to the phone
line (labelled with a mini drawing of a phone), the middle
part splits into either the 3.5mm audio jack for a recording
device or speaker, or to a homemade recording device on the
right-half side that starts and stops recording and saves the
recording as a .wav file on an SD card in a push of a button.
The homemade recording device is made using an Arduino Nano
and an SD card reader module  Wiretap connected to recording
device. The 3.5mm jack is not connected to anything
|
Alarm SystemAfter realizing our alarm system was fitted with a shock sensor that requires potential intruders to be polite enough to knock first, I decided it was time to get a new alarm system in place. This simple alarm makes use of an active buzzer, a limit switch, and a 9V battery. This setup is very straightforward: once turned on, if the door is open (limit switch is not pressed), the alarm goes off. Otherwise, it just sits quietly. I haven't mounted the device in this demonstration, so I had to have it held in place. Video demo of alarm system |
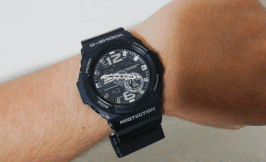
Duplicate ID
Watch Attachment
|
Emotional RobotHave
you ever wanted a pet? A dog? A cat? An emotionally unstable
robot? Well, as part of our project, we built one of the
above. With the use of the Parallax Activity Propellor Board
WX, and apart from the servos and wheels, we fitted the robot
with sensors that lets our pet, Phineas-bot, react
accordingly. A passive buzzer was used to play music for
different moods, and a reed switch allows us to feed him his
favourite treat: magnets. An ultrasonic sensor lets him see,
while a microphone sensor lets him hear. Below is a list of emotions, its triggers, and a video demonstration:
Video demo of our emotional robot "Phineas" |
AM/FM Generator with PWM & an FPGA BoardAs
part of our final project, we had to program our
field-programmable gate array (FPGA) board using Intel Quartus
Prime, a programmable logic device design software. Using
Quartus, we programmed the board in Very High Speed Integrated
Circuit Hardware Description Language (VHSIC-HDL; VHDL) and
built a wave generator using Amplitude Modulation and
Frequency Modulation. The FPGA outputs digitally using Pulse
Width Modulation (PWM), and so with the help of an DAC circuit
we've built, we can acquire a smooth output as seen by the
oscilloscope. We've also included an IR distance sensor that
changes the wave output according to the distance, as seen in
the demonstration where my hand is in front of the sensor.  Amplitude modulation with respect
to distance sensor output
|
Electronic Die and Digital ClockWhen you are unsure if it's the right time to gamble, or play some board games. Have no fear, as these 2 projects cover both the when and the how. As part of a kit to practice soldering and electronic schematic literacy, the digital clock makes use of a 4 digit 8-segment display, an 8051 microcontroller, 12Mhz crystal oscillator, and a buzzer. It acts as an alarm clock, stopwatch, and countdown timer. The electronic die was made from an IDC-7 kit, and it's a nice and straightforward replacement for any die. 

Showing off the clock at
8:04PM
Rolling with the electronic die
|
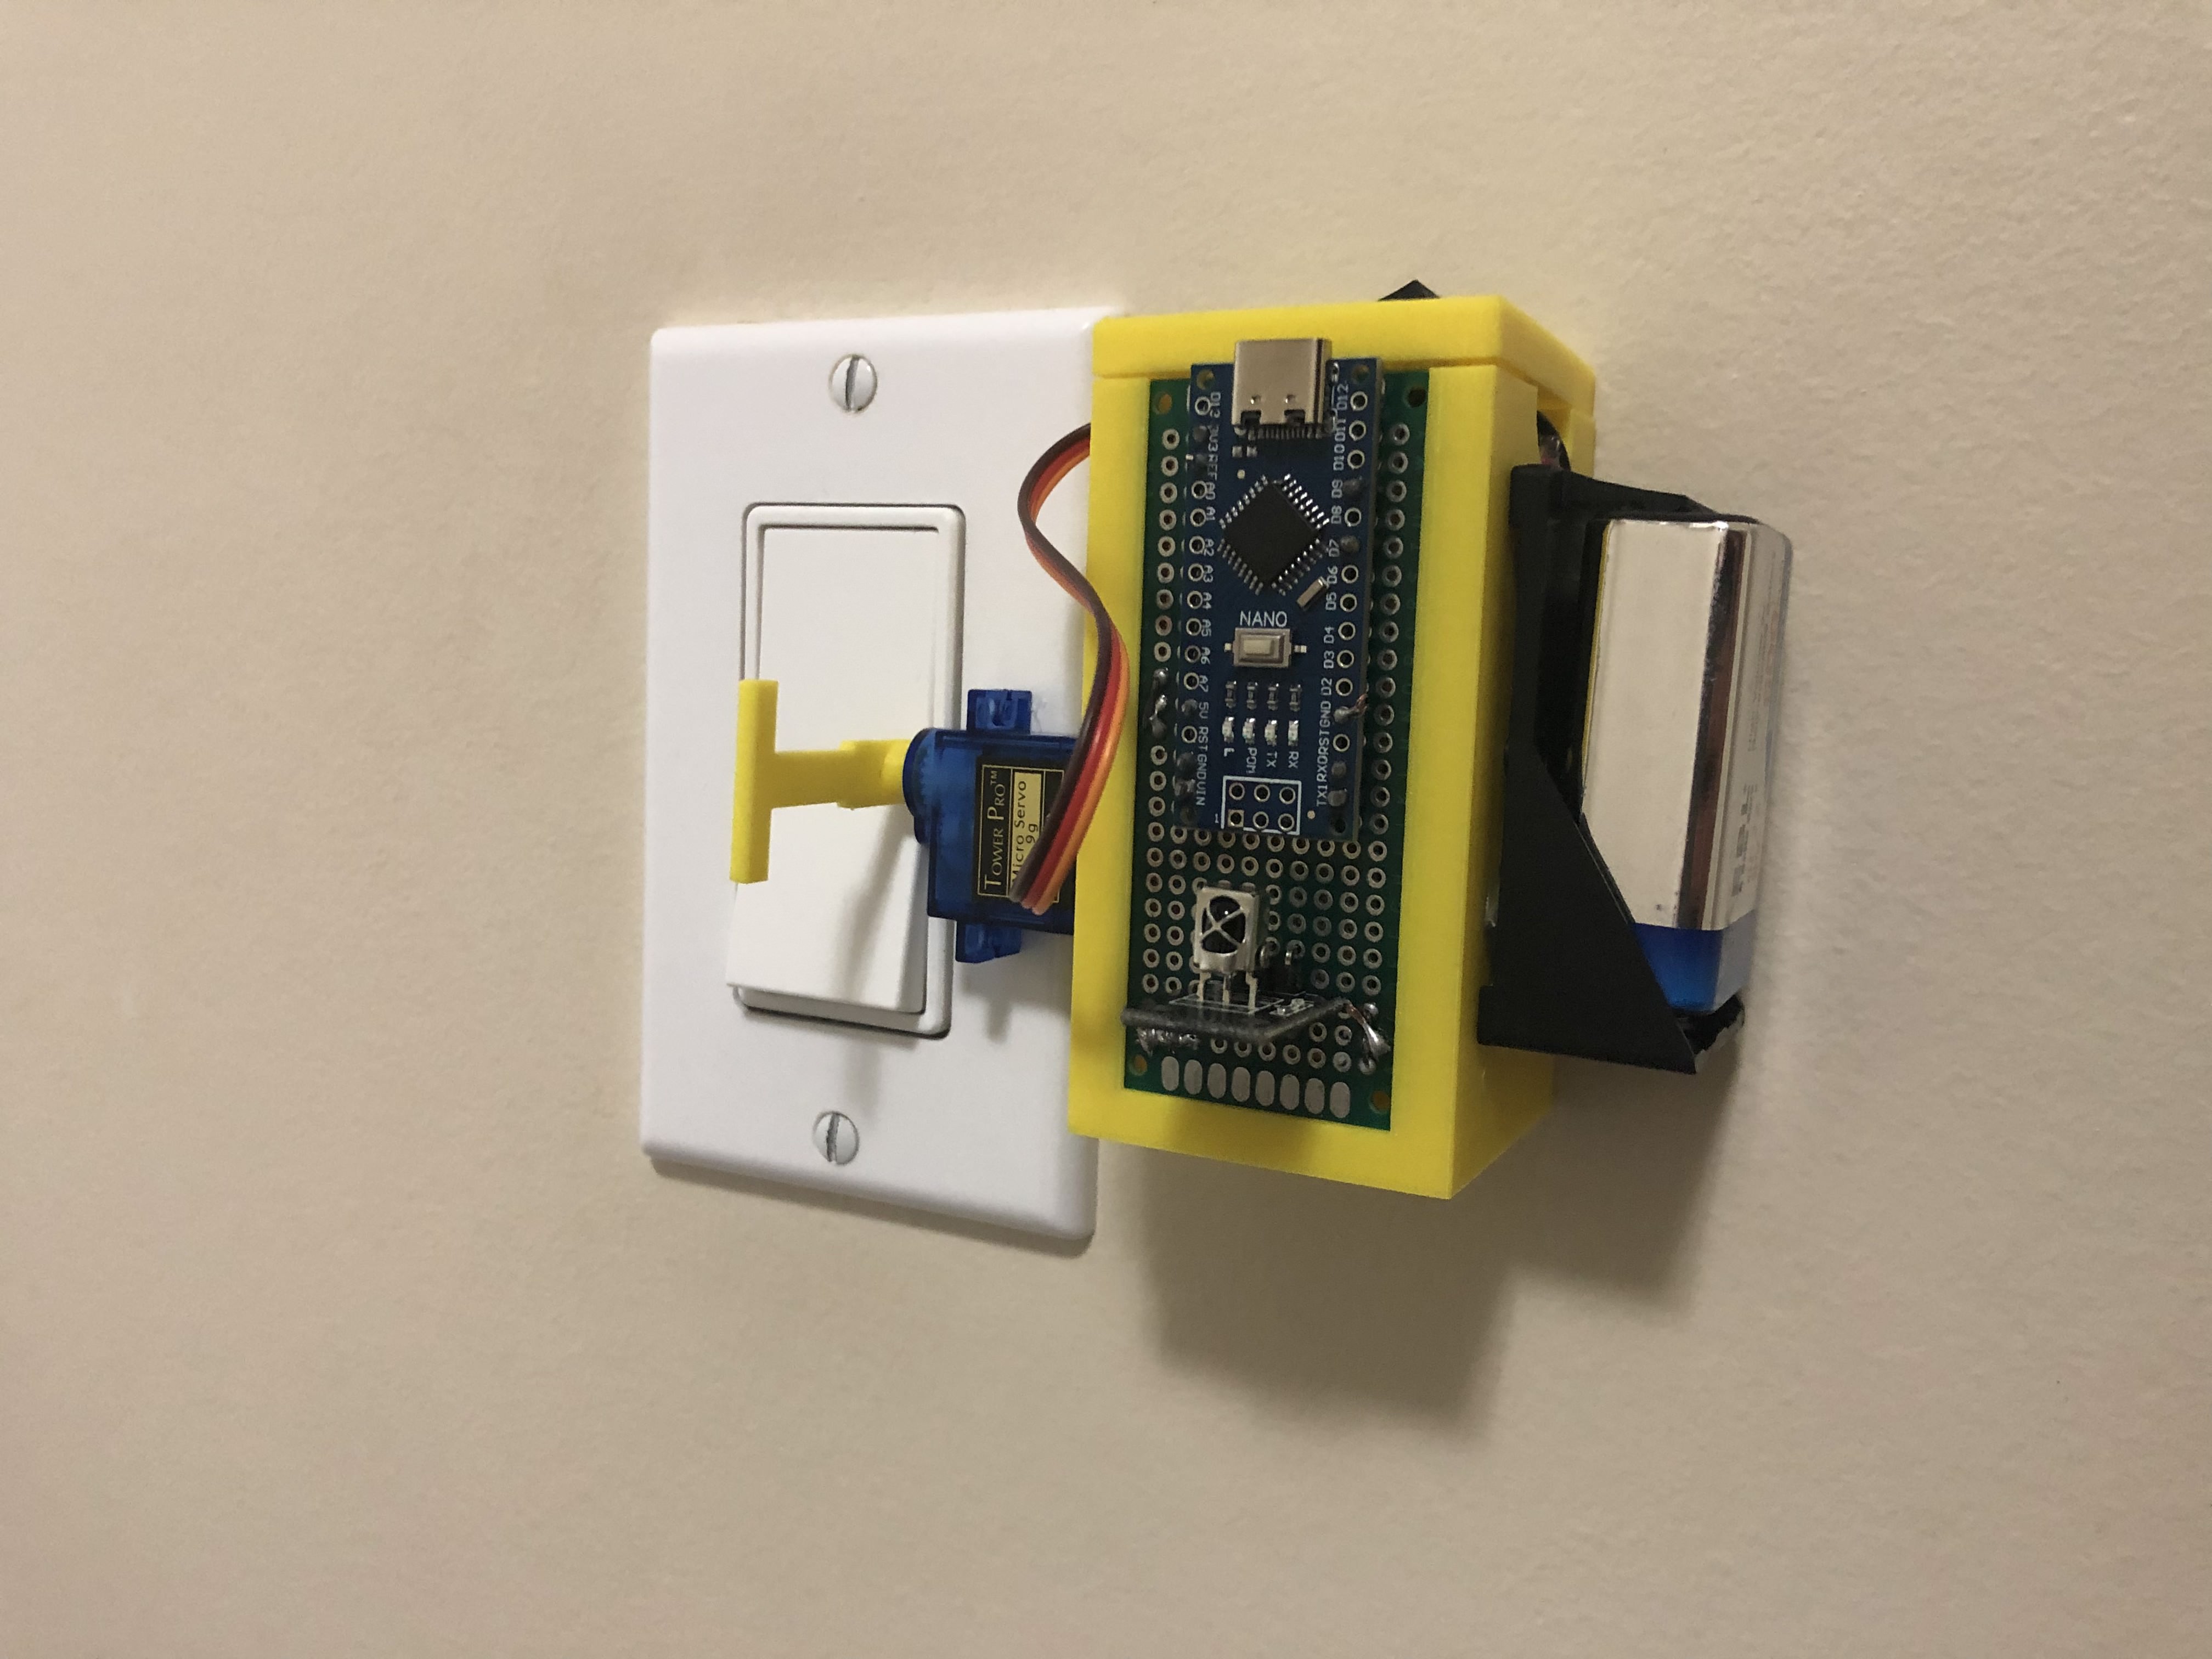
Remote
Controlled Light Switch Flipper
|
Rise &
Fall Android Game
|